Upload and view your first slide
This page assumes you have a running DSA instance from Install on one machine. It walks through creating a place to put an image, uploading a slide, and opening it in HistomicsUI.
DSA organizes data in a hierarchy:
An image file is uploaded into a folder. DSA groups the file into an item,
and large_image reads that item as a slide.
1. Sign in
Open http://localhost:8080 and sign in as admin with password password.
Change the default password before you let anyone else use the instance. The administrator controls are under the user menu and the Admin console.
2. Create a collection and a folder
- Open Collections in the navigation.
- Create a collection, for example
My slides. - Open the collection and create a folder, for example
Test uploads.
Collections and folders carry permissions. Keeping test data in its own folder makes it easy to remove later.
3. Upload a slide
- Open the folder you created.
- Use the folder's upload control, or drag the slide file into the folder view.
- Wait for the upload to finish. Whole-slide images are large; a slow transfer is normal.
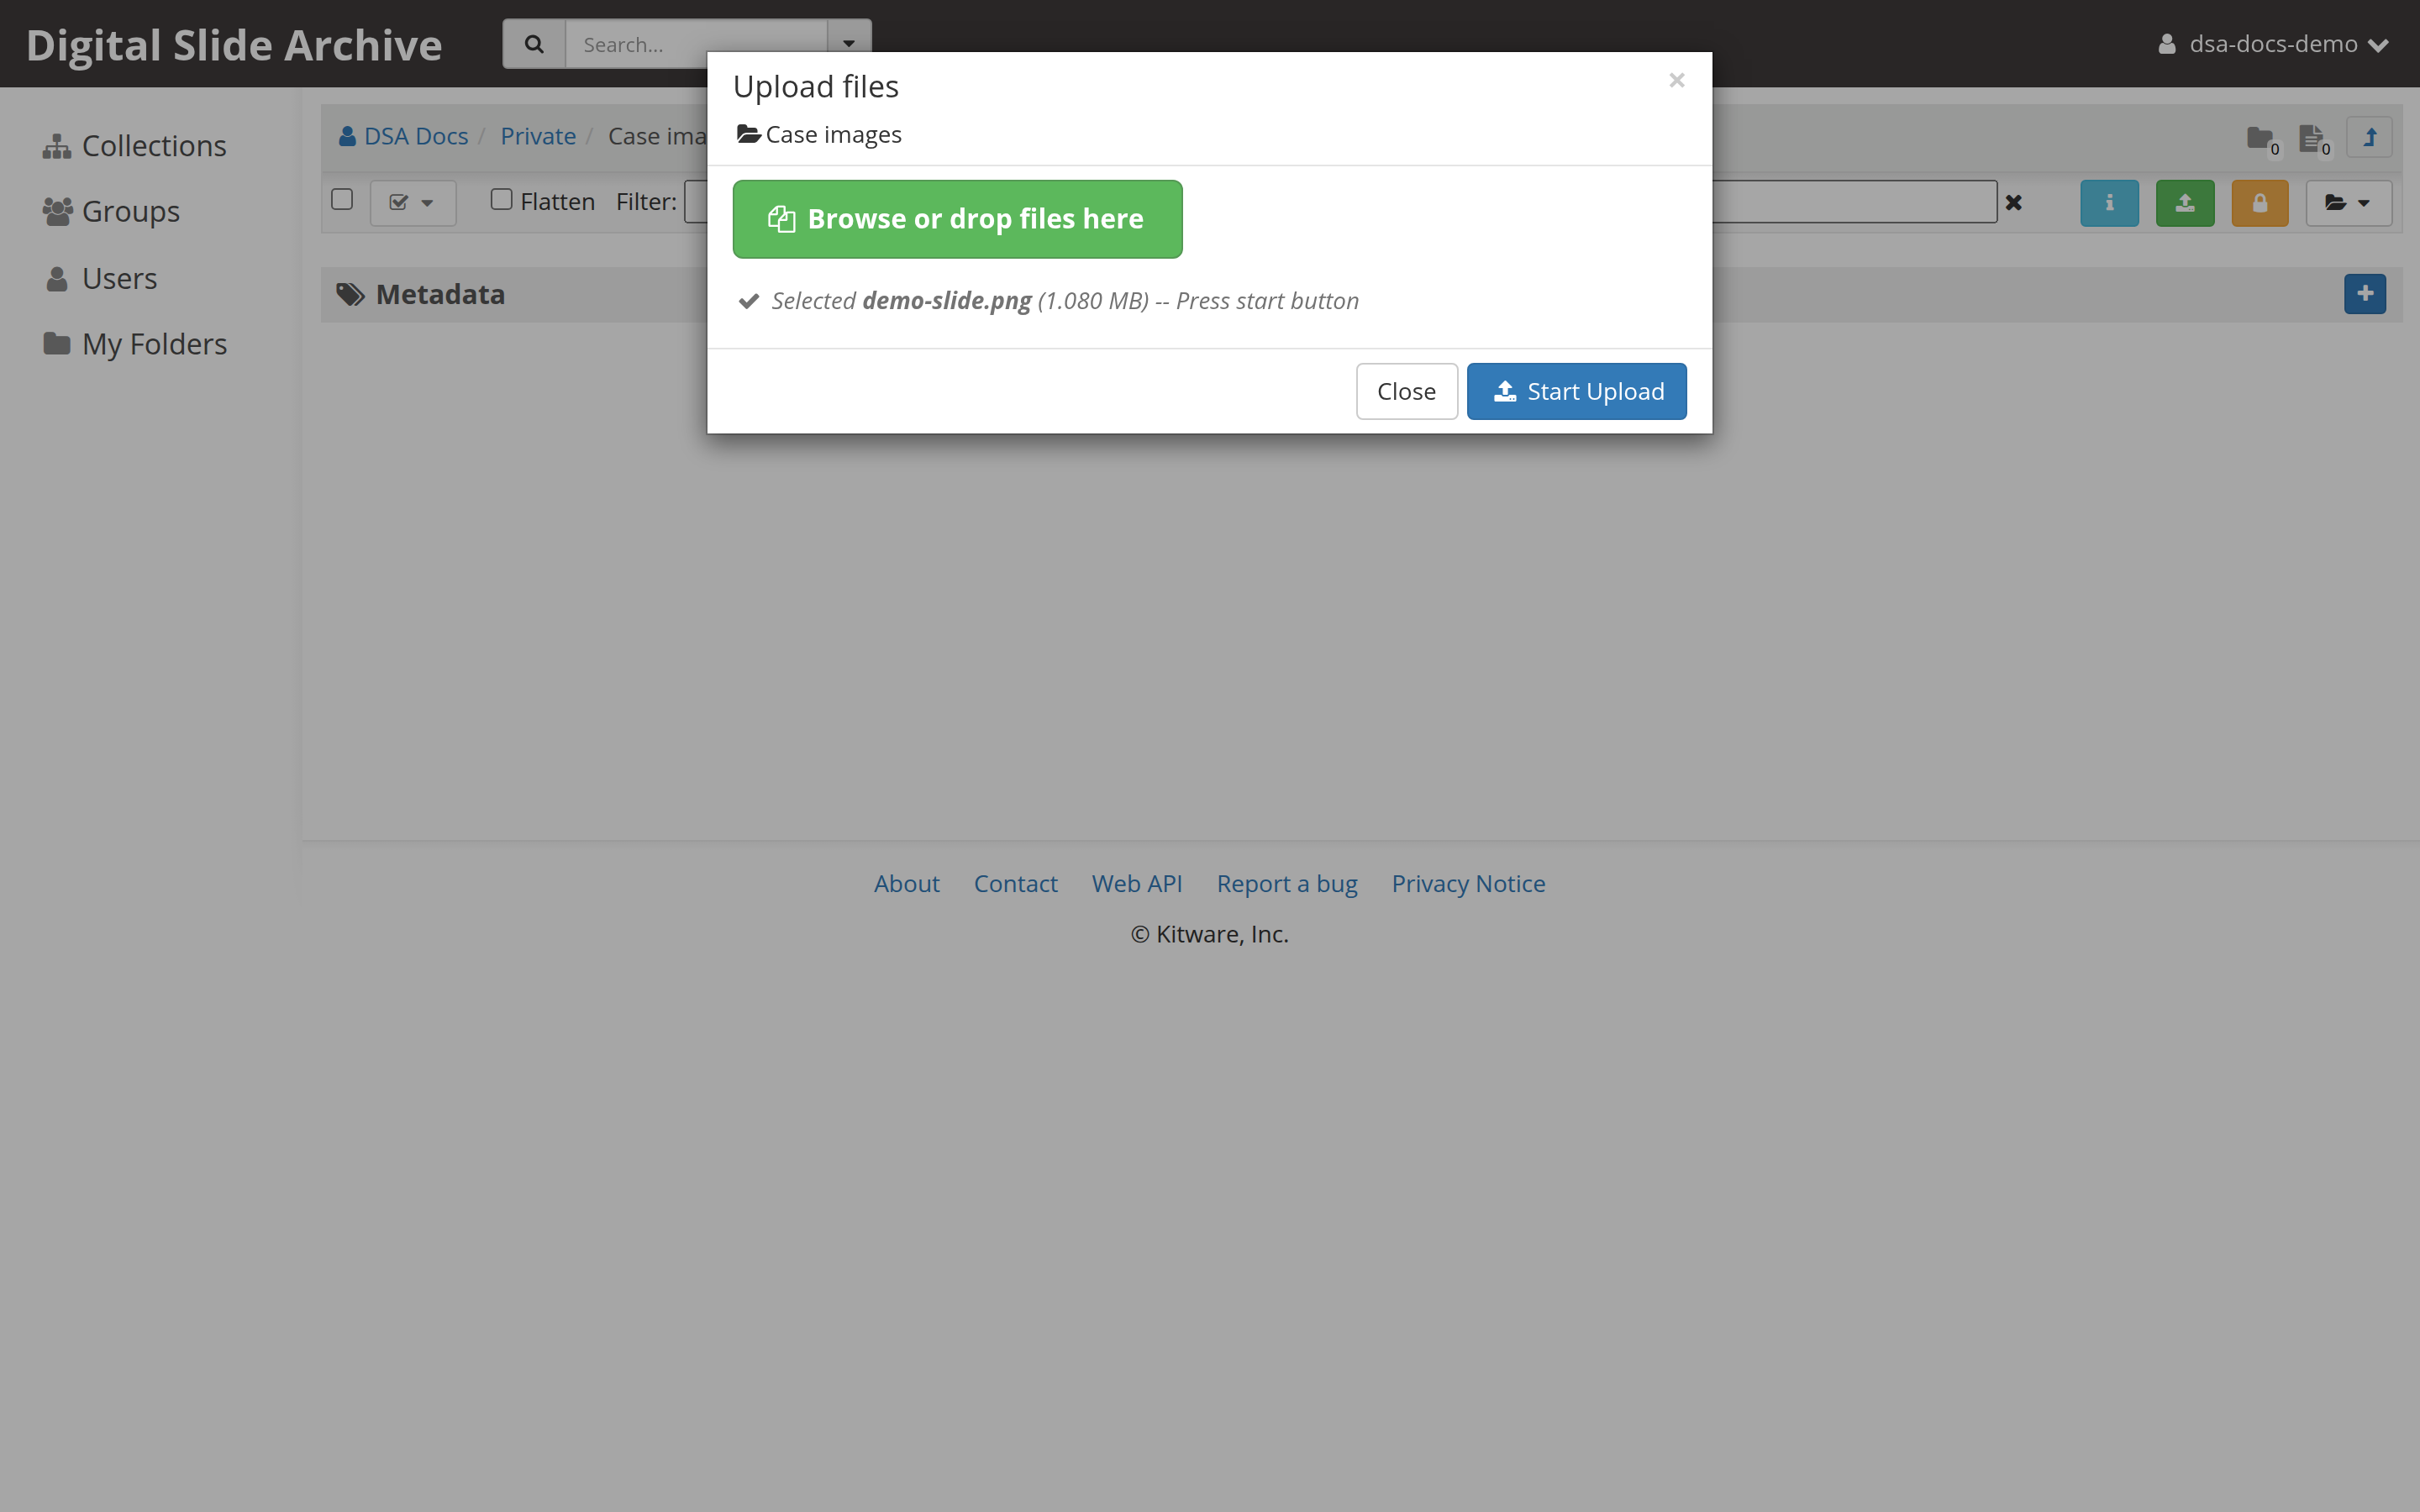
When the upload completes, the file appears as an item in the folder. DSA does not add sample data by default, so this is your first item.
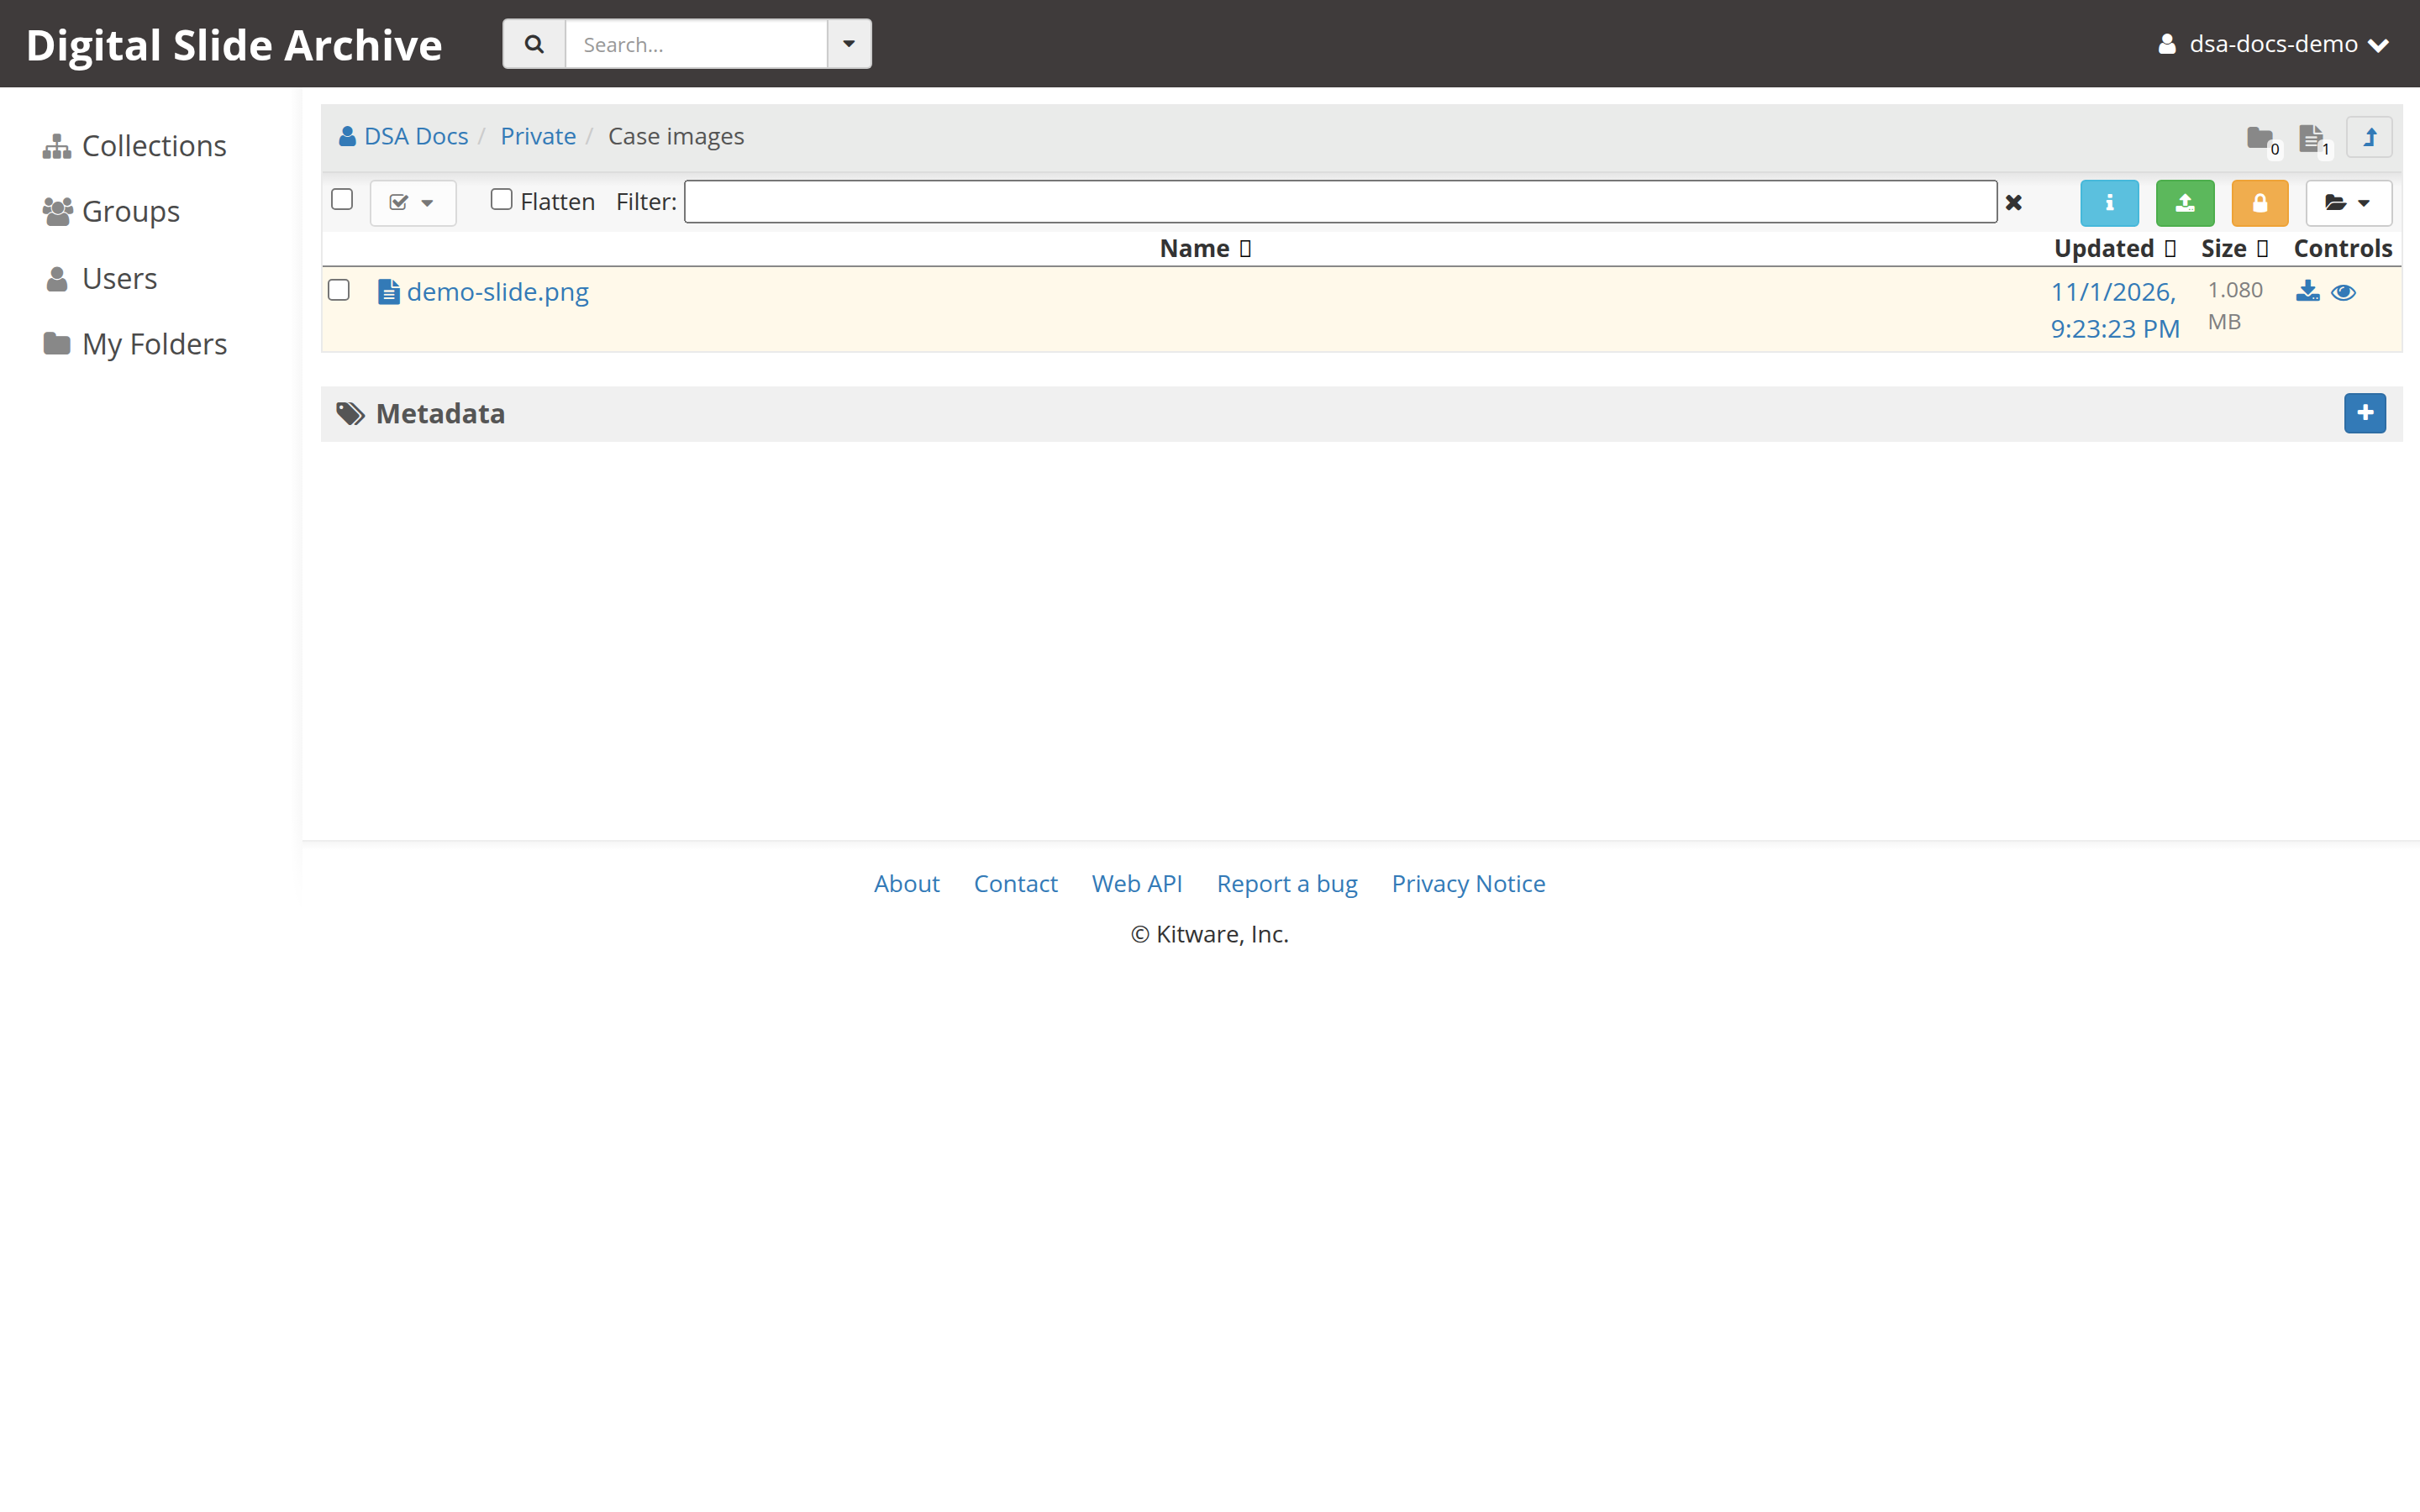
This drag-and-drop route is best for a few slides. For scripted uploads, the REST API, or importing files that already live on a mounted data store, see Upload or import images.
4. Open the slide
- Click the item to open its item page.
- If
large_imagerecognizes the file, the item header shows Open in HistomicsUI. Click it. -
The viewer opens at a URL like:
The default HistomicsUI webroot path is
histomics.huiis also available.
If the button is missing, large_image did not recognize the file as a large
image. Check the file format, convert it to a pyramidal TIFF or OME-TIFF, and
upload it again. See Unsupported formats
and the format row in the install troubleshooting table.
5. Navigate the image
- Drag with the left mouse button to pan.
- Use the mouse wheel or right-drag to zoom.
- Drag in the overview panel to jump to another region.
- Open the annotation and analysis panels from the viewer controls.
The full list is in Mouse and keyboard controls.
Optional: load sample data and run a test task
The reference deployment includes a CLI test script that downloads sample data
and runs nuclei detection with HistomicsTK. From devops/dsa:
It prompts for the administrator login and password. You need Python 3.6 or
later and the girder-client package. The analysis task also needs a connected
worker and working Docker socket access.
This command was not executed in the documentation environment because no
DSA instance or Docker daemon was available there. It is transcribed from
devops/dsa/README.rst at commit 2e16b9a.
Next
- Upload or import images — the other upload routes and importing from a bind-mounted data store.
- Mouse and keyboard controls
- Next steps